Tubular cast-on without the waste
![]() Tubular cast-on the Italian way is done without the extra yarn in contrasting color. It's no better or worse than the way it's done in the US. The result is identical: only the process differs. I like it because there is no unnecessary waste and you don't have to worry about finding a sacrificial yarn in the same weight, but different color. Here it goes (video clip of the cast-on and first row at the bottom of this entry).
Tubular cast-on the Italian way is done without the extra yarn in contrasting color. It's no better or worse than the way it's done in the US. The result is identical: only the process differs. I like it because there is no unnecessary waste and you don't have to worry about finding a sacrificial yarn in the same weight, but different color. Here it goes (video clip of the cast-on and first row at the bottom of this entry).
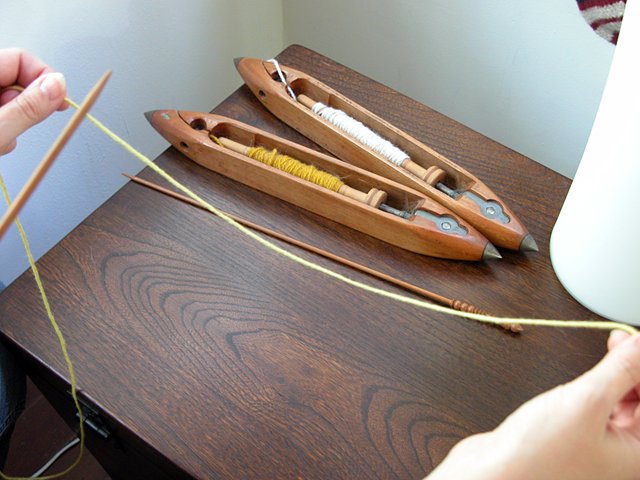
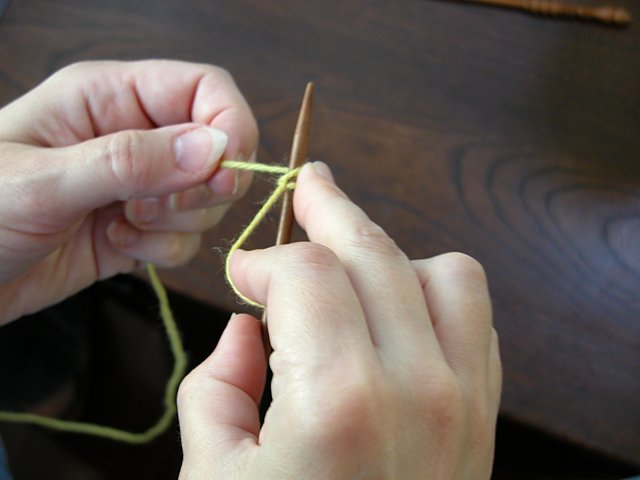
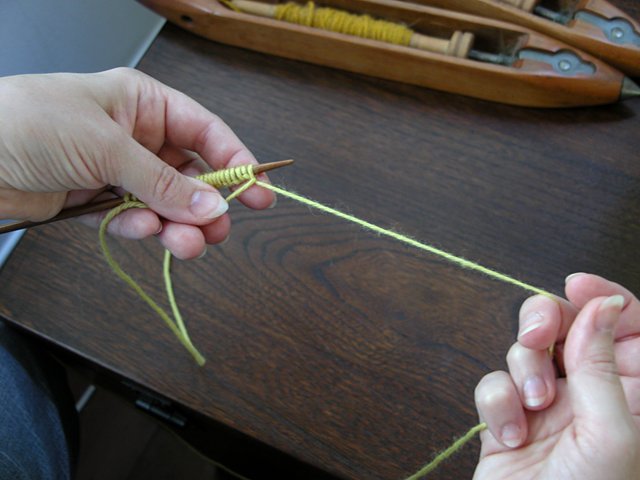
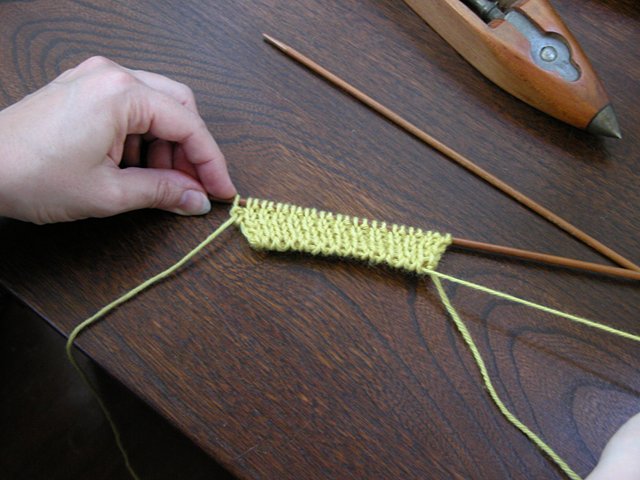
You'll need an equal length of yarn on both sides to cast on the stitches, so leave a tail as if you were doing a long-tail cast on.
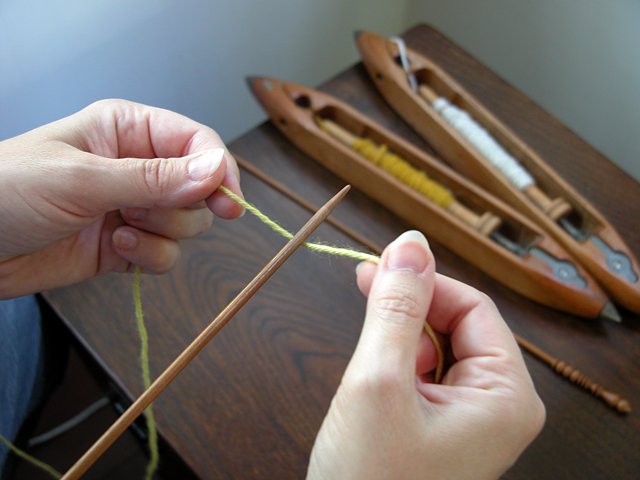
Holding the yarn with both hands, place it under the needle, keeping the tail in your right hand. NOTE: I keep the needle under my armpit so I have one less thing to worry about while I cast on.
From now on, you will alternate between using left and right hand, moving the yarn with one hand and holding the last stitch in place with the other hand.

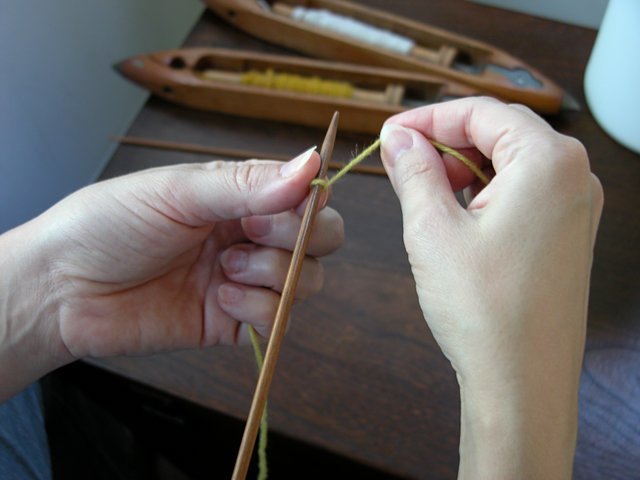
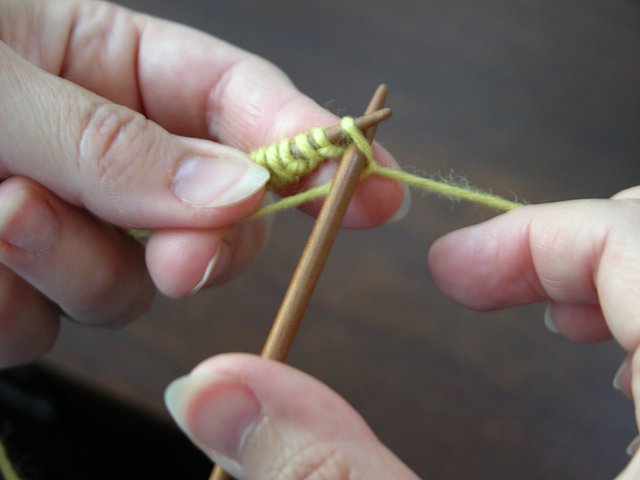
Let's start. With the left hand, bring the yarn over the needle left to right, while the right hand keeps the bottom part of the yarn in place.

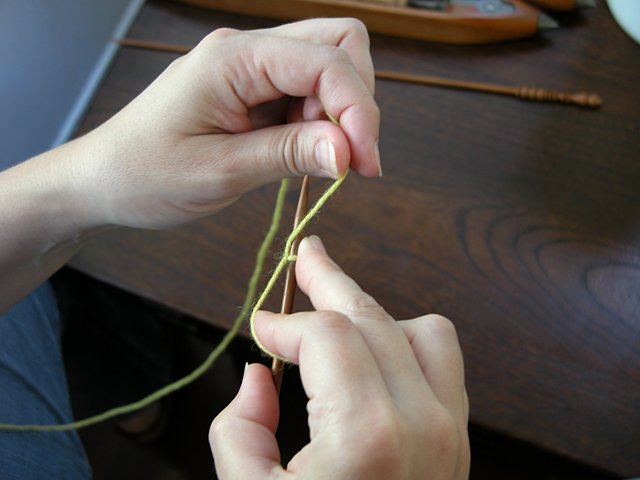
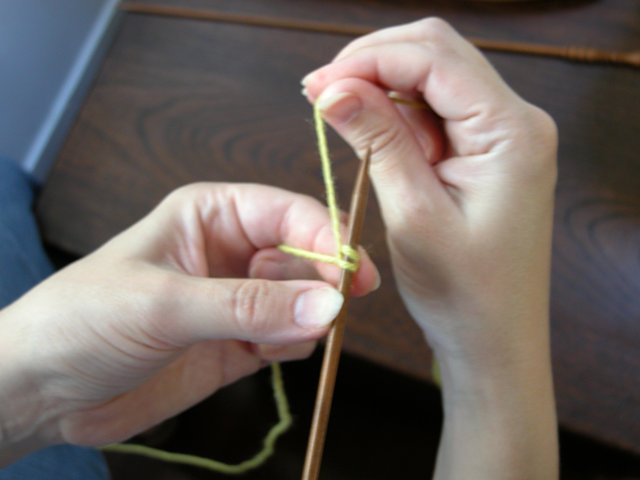
Now hold the yarn in place with the left hand and with the right hand bring the right tail from right to left under the needle.

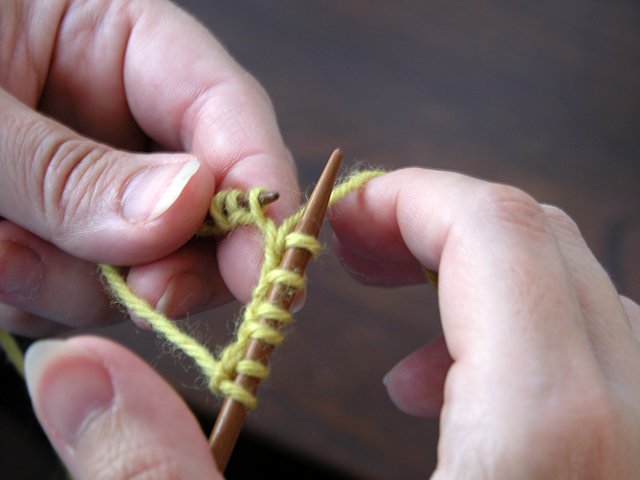
Left hand: bring yarn over the needle left to right.
Right hand: bring yarn under the needle, left to right.
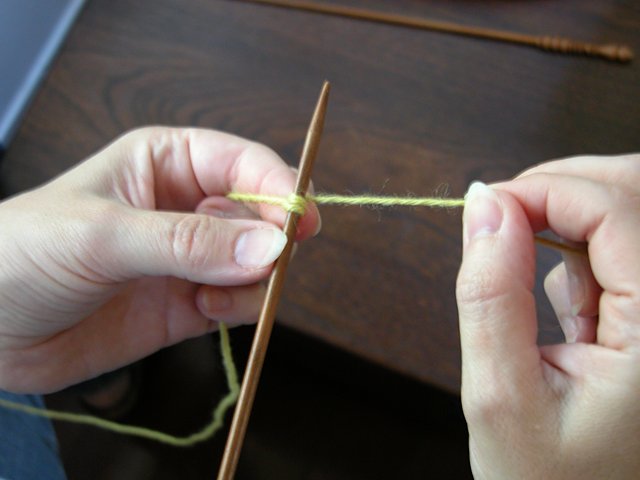
You have just cast on two stitches. Repeat this sequence until you have cast on the desired (even) number of stitches.
To recap the sequence:
1. Left hand: yarn over needle L to R
2. Right hand: yarn under needle R to L
3. Left hand: yarn over needle L to R
4. Right hand: yarn under needle L to R
Basically, the left hand will always perform the same action: bring the yarn L to R over the needle.
The right hand will always bring the yarn under the needle but alternating between L to R and R to L.
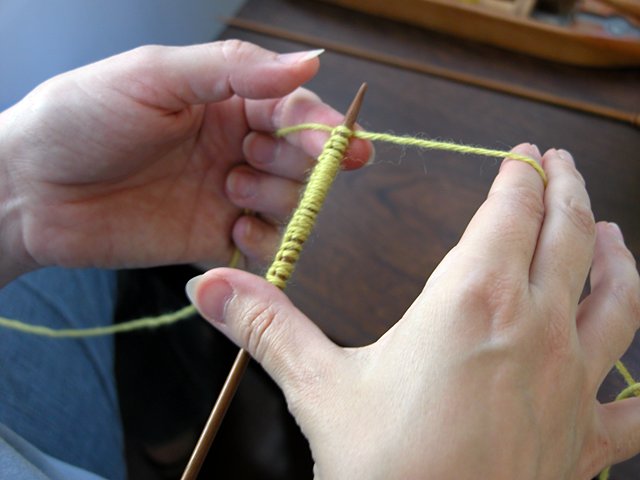
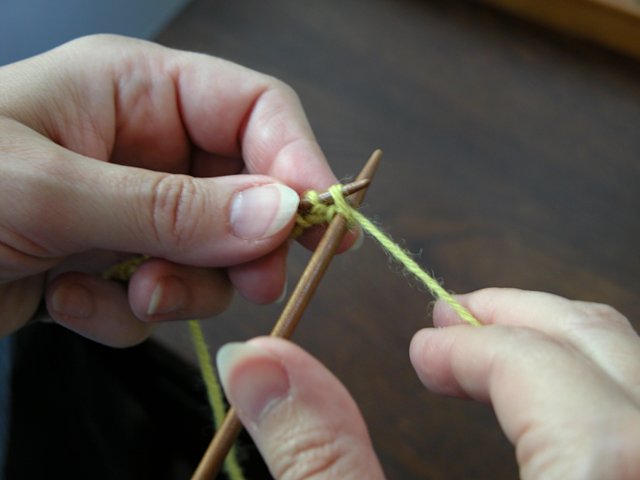
When you have the desired number of stitches, make sure you hold the last stitch in place as you change hands.
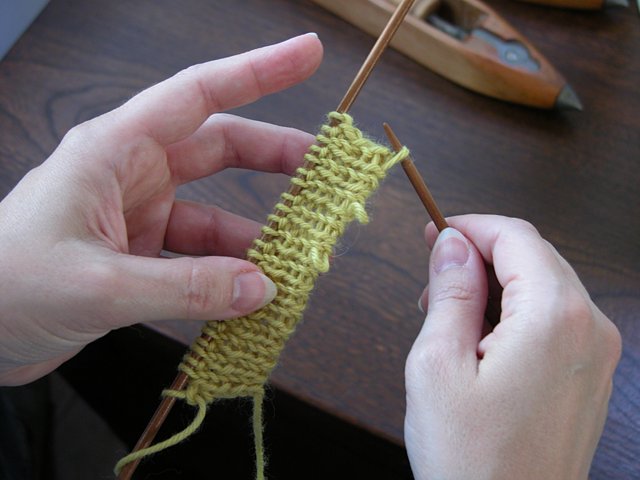
Knit the first row like this: *knit one, slip one as if to purl keeping the yarn in front of the work.* Repeat those two stitches for the rest of the row.
Knit three more rows like this. (Actually, you could do just two rows instead of four. It's a matter of preference).

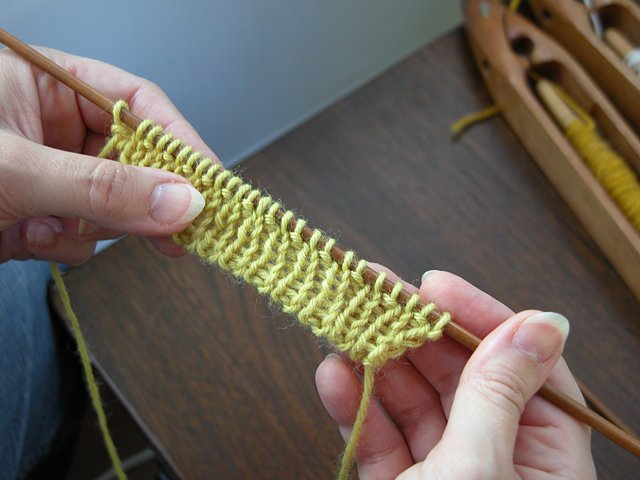
This is my sample with four rows of *knit one, slip one as if to purl* followed by two rows of *knit one, purl one*.
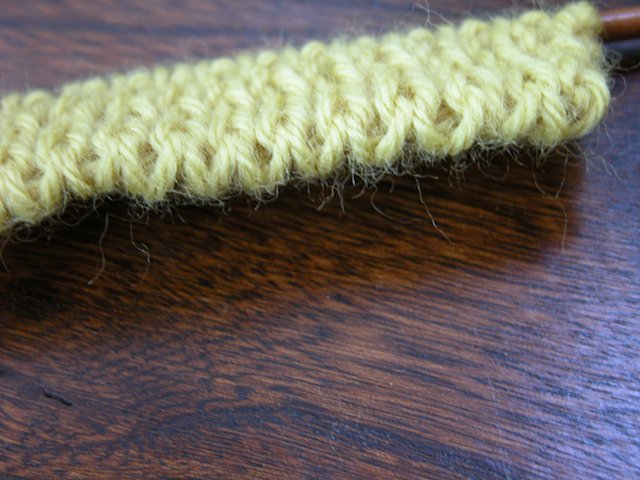
This is what the edge looks like at this stage. And now the fun part. Removing the thread from inside the "tube".
Stretch the edge to see which thread moves inside the tubular part and with a needle or your fingernails pull out a piece of that thread just enough to make sure you got the right thread. This part is the only tricky step. I usually pull out the thread at several intervals to make sure I really have the right one. Obsessive, moi?
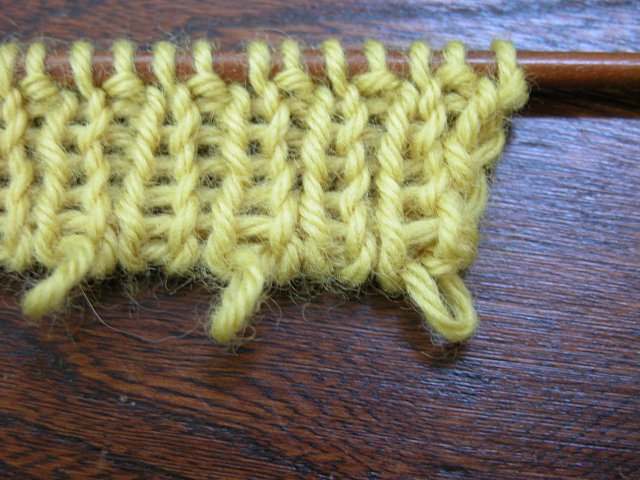
Now pull.
Et voilà, les jeux sont faits. You have your tubular edge and you didn't waste any yarn.
NOTE: This cast-on is rather elastic and sturdy and well suited to sweaters, particularly when using 1/1 ribs. It's not indicated for thick yarn.
Special thanks to Andrea who put up with me all afternoon taking pictures and even videos. I may have a video clip to add to this entry tomorrow.
July 16, 2006
You can now watch a video of the cast-on and first row. NOTE: You'll need QuickTime to play the video. Sorry, but I didn't have time to convert to a variety of formats and QT is a free download available for both Mac and Windows.
Comments
Thanks for this great tutorial! I just discovered your blog a few days ago and this is exactly what I've been looking for.
Posted by: Shannon | July 16, 2006 9:19 AM
wow thanks for the tutorial! i will definately being trying this out on my new project. x
Posted by: the knitchick | July 16, 2006 7:32 PM
Wow! Thanks Francesca & Andrea, that must have taken some time to do. I'll be trying your way when I do Am Kamin.
Posted by: Marina | July 17, 2006 5:41 AM
That's amazing! I found this tutorial from Andrea's blog, and I'm SO excited that you provided a video too. Thanks!
Posted by: FemiKnit Mafia | July 17, 2006 10:35 AM
I see no video can you email me the video I would love to see it I learn better when I can see things done versus still photos
Posted by: Tonya | July 17, 2006 2:16 PM
Thanks to both of you for producing this valuable resource! Especially the video brought it all together for me and I now understand this (previously) puzzling cast on. You are angels!
Posted by: Suz | July 18, 2006 9:44 PM
I want to thank you for this tutorial. I love tubular cast-on and this way definitely looks the best way to do it! I am so happy to have found your blog.
Posted by: Jason | July 21, 2006 12:18 AM
Thanks for the great tutorial!
Posted by: alice | July 28, 2006 2:06 PM
Hola Francescita, Love your blog. What do I need to make the videos play on my PC? Abrazos, Ricardo
Posted by: Dick Heimbold | November 23, 2006 11:04 AM
Great blog. Lots of interesting stuff. Particularly interested in the Italian tubular cast-on but where the video is supposed to be I am just getting a blank empty square. I would love to see the video. Do I need something special to see it?
Posted by: hookiemama | December 8, 2006 8:45 AM
Hookiemama : I tried to email you directly but the message bounced back.
To see the video you need QuickTime. Sorry, but I didn't have the time to convert to a variety of formats. QuickTime is a free download available for both Mac and Windows.
Posted by: Francesca | December 8, 2006 9:18 AM
The pictures are great and would love to see the video. I do have Quick Time on my computer what do I need to do for view it?
Thanks,
Posted by: Barb | December 11, 2006 2:09 PM
Figured it out. Needed to change the plug in. Thanks. Great!!
Posted by: Barb | December 11, 2006 2:28 PM
Thank you for taking the time and effort, and thanks to your helper, to put this tutorial together. This cast on was needed for my current project, and I had never heard of it. Your tutorial was by far the easiest to follow and get proper results from, of all the one's that a google search provided. I appreciate you for sharing your talent with those of us who are still learning. Thank you! Thank you! Thank you!
Posted by: Gina Deriso | January 5, 2007 3:38 AM
Thank you, Francesca, for going to so much trouble to make this very cool cast-on method comprehensible! I just used it with lace-weight wool/silk and it looks fantastic. From now on, I think I'll cast on all my top-down socks this way.
Posted by: Judi P. in Cleveland | January 14, 2007 8:11 AM
HI,
Thanks for this tutorial. It seems much simpler than using the provisional yarn.
I'm a bit confused by what you do on the first row. Knit one I got, but "pass as if to purl"? That doesn't mean slip as if to purl, right? I've watched the video numerous times and I can't figure out what exactly you're doing.
Posted by: Mrs Peterson | January 22, 2007 8:51 AM
Mrs. Peterson,
Ah, silly me… one of my italianizations. Of course, you're right. I meant "slip" as if to purl. Thanks for catching this. I'll change that word in the instructions.
Francesca
Posted by: Francesca | January 22, 2007 12:06 PM
It might be helpful to note that where you say "slip yarn as if to purl" you mean that it should be done with the yarn in front of the work as well as without twisting the stitch -- it's somewhat ambiguous, although close perusal of the pictures does indeed show that the yarn is in front.
Posted by: Sara | January 30, 2007 4:02 PM
Sara: Thank you for your feedback. I incorporated your suggestion to specify that when slipping a stitch as if to purl the yarn should be kept in front of the work. It didn't seem necessary to specify a negative (that the stitch should not be twisted), since twisting the stitch is not the default way of knitting.
Posted by: Francesca | January 31, 2007 10:34 AM
This is wonderful! Tubular cast-on is my favourite way to start cuff-down socks, but it's so fiddly and time-consuming using waste yarn.
I never thought of doing it like this. Thank you. :)
Posted by: Put a Sock in it | February 2, 2007 2:42 PM
This is such an awesome tutorial, thank you so much!
Posted by: Sam | February 3, 2007 2:59 PM
thanks for this tutorial. I used to do a tubular cast on with waste yarn (a continental technique, I think), which needed to then be worked into 2x2 rib (which I dislike intensely). I have seen these instructions somewhere before, but actually seeing the video makes it clear about how to move the two strands around the needle. Usually use long-tail cast on, but that produces a less-than-stretchy edge. This would be great for hats where you don't want an edge digging in across your forehead. Thanks again
Posted by: Judith Martin | February 13, 2007 11:47 PM
Thank you so much for this tutorial, i really wasn't feeling the other method s of this cast on . Thanks again!
Posted by: Tawana | February 25, 2007 4:52 AM
Brilliant tip - thanks for posting this! I've done tubular cast-ons before, but not with this method - simple, interesting.
Posted by: KarenK from the OR Coast | March 1, 2007 5:21 PM
Wonderful blog! Improving the quality of life on many fronts. I have a question and two comments.
First the question:
Do you know of any really nice knitting yarn stores near either Los Alamitos (Orange County) or Riverside? What about West Hollywood?
Comment 1:
After examining mom-made sweaters of a friend from Rijeka (Fiume?), I taught myself to cast-on a tubular edge exactly like yours, except that I hold both strands of yarn in my left hand hold the needle in my right hand, and move that right hand needle so that I get the same result as yours. Maybe it's easy for me to do it this way because I knit with the yarn in my left hand. (I don't know whether you're a yarn-in-left or yarn-in-right knitter). The advantage of my way is that you can use short needles (e.g. for mittens, socks).
Do you know anyone else who does it this way?
Comment #2: I don't understand the purpose of pulling out the strand at the end. Why bother doing this?
Thanks,
Dan Schultz
Posted by: Daniel Schultz | March 21, 2007 12:13 PM
Thanks you so much for tubular cast-on info--I've been trying to figure this out ever since I started using patterns from the old Gioielli magazines from the 1980s. I'm still using them. They have fabulous patterns. You don't happen to know where I can get back issues, do you? I've tried all the usual sources.
Anyway, grazie mille for all your time and trouble.
Posted by: woollymama | April 3, 2007 1:47 PM
I love the way you have shown how to do the tubular cast on. My question is, in your recap written instructions shouldn't the second line say under the needle from R to L and then the 4th line say from L to R? Is it possible to do this cast on using double pointed needles for socks? Is it possible to do the tubular cast on with a 2 X 2 rib and would this change the knit 1, slip 1 with yarn in front rows?
Thanks
Posted by: Anne Greene | June 14, 2007 8:03 AM
Anne, you're right! Thank you so much for catching this and letting me know. And you wouldn't believe how many times I checked this entry. I'll fix it right away.
I have used this cast-on for circular wristlets and it gets tricky. You can do it, but it's not as easy on DPNs or circulars. What I do is cast on on long straight needles (because I stick the needle under my arm) and then join after the first four rows.
As much as I like the tubular cast-on, it doesn't really work as well outside of 1/1 ribs. I tried the 2/2 ribs with a variation of this system, but was not happy with it. You can see what I did at Cast-on Tests.
Posted by: Francesca | June 14, 2007 9:55 AM
Thanks for this tutorial! I've finally found the easiest tubular cast on!
Posted by: marjorie | June 20, 2007 11:28 PM
This is a great tutorial. I just tried it out, and since I like using circs, I examined the composition for working it with the yarn in one hand. As someone mentioned above, it's possible to do it this way. As it turns out, it's EXACTLY the same as working a provisional/invisible cast-on using scrap yarn (not the crocheted provisional, obviously, but the one that's a bit like the figure-8). The tail end which will get pulled out in the end is used just like the scrap yarn in the PCO, to anchor the stitches. When I figured that out, it went much faster. :) Incidentally, this is not the same as the first tubular cast-on in the Reader's Digest Knitter's Handbook by Montse Stanley. They look similar at the start, but the two strands are completely interlocked in that one.
Posted by: djinnj | July 7, 2007 10:34 PM
i hope you don't mind, but i used one of your images in a post about your tutorial on Lime & Violet's Daily Chum.
here's the link:
http://www.limenviolet.com/blog/?p=222
thanks a ton!
Posted by: minnie | August 8, 2007 9:28 AM
This was a great tutorial. The video helped especially and the part about always doing the same action with the left hand. I just tried it and had absolutely no problems at all.
Found this via Lime & Violet, btw
~marnie
Posted by: Marnie | August 8, 2007 2:12 PM
What a fantastic tutorial. Thanks for sharing this.
Posted by: Emily | August 15, 2007 1:51 PM
Good tutorial! I did a tubular cast-on a couple of days ago for the first time and it took me a couple of days till I started because I had to look for the right waste yarn. It's pretty cool that now I know how to do it without.
Posted by: projektleiterin | August 30, 2007 11:00 AM
I just cast on for Eunny's Anemoi mittens using your tutorial. My, I knew the Italians were kings in many fields, but this one was a new one for me! It's simply perfect! Thank you for the fabulous tutorial!
Posted by: Maud | September 17, 2007 10:45 AM
I don't see how this prevents wasted yarn - aren't you left with a VERY long tail after you pull the tail out of the 1st row? And you've wasted your project yarn, instead of some other "waste" yarn. Am I missing something?
Posted by: Catherine | September 26, 2007 7:37 AM
Catherine,
The tail you are left with is from the first row; with the waste yarn method that would be a lot more. Also, I use the tubular cast on for sweaters and use that tail to sew up one side, so for me there is no waste.
Posted by: Francesca | September 26, 2007 9:51 AM
Hi - I'm not sure why/when I would use this. Can you give me an example. Thank you
Posted by: Marilyn | October 5, 2007 4:46 PM
Wow how wonderful!
I met this through Eunny's Endpaper Mitts pattern.
It is so much more strechy than regular tubular cast-on, and a lot easier than knitting the bottom edge together with the place you fold, I always find that a bit fiddly. But now I need not worry! I just do simple slip stitches and voila! Out of space appears this magnificent edge.
Thank You!!!!!!!!!!!
Posted by: Aurelija | October 10, 2007 1:04 PM
hi --
this is a great tutorial. it only took me a couple of read-thrus and video watchings to get this. i LOVE this cast on now.
but i have a question. is there a way to do this cast-on with more than one colour? like if i were trying to do an intarsia project.
i've been trying to figure on my own how i'd accomplish this but nothing seems to make sense. :\
if you see this and answer, i will be so grateful!! :D
Posted by: Lorelei | November 7, 2007 9:46 PM
Thank you!
Posted by: Laura | December 17, 2007 5:10 PM
Just wow and thanks for this great tutorial! I surely will incorporate this technique to my knitting.
I remember that the embossed leaves socks from Interweave knits had somewhat similar way to start the cuff (with knits and slipped stitches). But there was a difference on cast on and the end result was not tubular at all.
Merry christmas and happy new year!
Posted by: Kamicha | December 25, 2007 3:01 AM
I love this cast on, and I've read through the comments to see if my question has already been answered, but I don't see it. Dan asked what I also don't understand -- why do you have to pull out the strand at the end? I have tried this several times and I while I get as far as pulling out little bits along the way to be sure I have the right one, I don't see where to start pulling -- so I just end up with a tightly pulled edge! The photos go from Now Pull to Voila, but I don't see what you're pulling and it's not in the video either. Any help is appreciated! Thanks so much.
Posted by: Martha | December 28, 2007 12:44 PM
What are the boat looking thingy's in the background?
Posted by: Justine | December 28, 2007 2:28 PM
i got to your site from a ravelry thread....a heartfelt THANK YOU! for a clearly documented technique. the video clip was very helpful to bridge the gaps between the still photos.
i read something that recommended that the tubular caston be done with needles smaller than the proj needle size to prevent the edge from flaring. is this your practice?
happy new year, jackie
Posted by: Jackie | December 30, 2007 5:47 AM
Thank you for the fabulous tutorial. I haven't seen the video but I thought your pictures were very informative. By the way, it's nice to meet another Francesca.
Posted by: Fran | January 3, 2008 5:50 PM
I think is the same I learned here in Spain, but I hold on the yarn another way... Thanks for great tutorial!!!
Posted by: prunila | February 5, 2008 2:42 AM
bonjour,
quelle découverte en arrivant ici !
toute cette verdure aromatique, çà sent le printemps
ces adorables chats, çà donne envie de calins
et moi qui commence humblement le tricot aux aiguilles, après quelques accessoires au crochet, j'admire ta technique, simple et rapide
et quels merveilleux ouvrages réalisés ...
j'aimerais faire le lien, si tu es d'accord
merci
Tine, de Paris
Posted by: Chez Tine | April 5, 2008 8:20 AM
This finally clicked with me. You are double knitting the first few rows before joining the front and back with regular stitches. I love your method but you said it does not work well for circular knitting and that's what I need. Thank you so much for this technique. I hope to use it soon.
Posted by: Kris | June 2, 2008 7:15 PM